Showing posts with label HomeLiving. Show all posts

Tuesday, 18 August 2015

DIY Message Center

Don't you hate it when papers, memos, reminders, bills are scattered in places they don't need to be? I know that feeling all too well. I decided that we needed a centralized place where all of this can be stored in a fun and exciting way! My pet peeve is walking into my living space that is left untidy. At one point, I had bills and random memos lying in a pile on the half wall in my kitchen and I decided that enough was enough! I needed to solve this issue ASAP. So, I did some research on Pinterest and came up with this nifty idea for a DIY message center in my kitchen!


Materials Needed
For this DIY project you will need a cork board, paint, a paint brush, some magnets, a hot glue gun, some push pins, a few decorative buttons and a shower caddy with strong suction cups.

Method
Start by painting the frame of your cork board with a colour of your choice. I chose to leave mine au natural. Once the paint is dry, glue on the magnets to the back. Ensure that the magnets can easily hold the weight of the cork board. In the meantime, glue on decorative buttons to the top of your pushpins. Makes things more interesting and exciting!

Once everything is dry, you are ready to hang the cork board on the side of your fridge. Right underneath, attach the shower caddy using the suction cups. (I got mine from IKEA for a great price!).

And you're done!


Why You Should Probably Do This
It makes life so much easier! All of my papers, important memos, invitations, bills etc. are now in one neat little spot. I no longer have to go on a hunt on my half wall to find something. I like that it's in a common spot so that my husband and I can see every time we walk past it. We can both go to this centralized spot to view upcoming reminders, to-do lists or invitations to events. It also adds a quirky touch that I love in our kitchen! We spend so much time in here, so it's important to add a personal touch and I definitely think that this was achieved with this DIY project.

How do you stay organized?

~Usha


Tuesday, 19 May 2015

Spring Clean Up Lists!


It's that time of year when the weather gets warmer and everything starts fresh! Every spring I like to do a major 'spring cleaning' day (or two) to get everything ready for the nice summer weather. I've been spending some of my time over the past few weekends to kick start my list and get things in gear. Here's what I like to do:

1. Clean out the garage with old junk and discard items that are no longer needed.
2. Store away all winter items (ie. shovels, snow brushes, winter coats, boots etc...)
3. Wash the garage and driveway to get rid of all the salt and sand from the long winter months.
4. Rake all of the dead grass and leaves.
5. Wash my front walk way and front door.
6. Give the garden soil some turning and churning to incorporate air for good growth.
7. Make sure all garden hoses are working and there are no leaks....
8. Pick up all trash and litter around the yard that might have been sitting around underneath the snow.
9. Give my car a really good cleaning (inside & out) from all of the winter dirt and grim.
10. Get rid of all of the garden weeds that are starting to grow. It's important to get the garden weeds under control early to make it manageable throughout the summer.

(Of course in between all of this, going to grab Starbucks or getting an ice cream or two, is also essential as well!)

What's on your typical spring cleaning list?

~RANDOMiss

Monday, 16 February 2015

Menu Planning

Menu planning can be such a bore and also a really big pain! Sometimes its like a chore but after I'm done, I'm so glad that I did! Many of you may have resolutions to eat better, save money on groceries or just plan your week in advance on what to eat so you're not stressing. Whatever your goal is, I hope I can share my tips and tricks on what I do for menu planning to make it quick, fun and easy!


Some of the benefits that I have found by menu planning are:
-I buy what I need - not more, not less. This helps me to save money by not overspending.
-By planning what meals I'm going to prepare for dinner, it saves me the stress of thinking, "What should I cook tonight?" Instead, I can go home and get started on dinner right away!
-I personally think meals made at home are healthier and they save you money in the long run!
-It helps with maintaining healthy eating habits
-Encourages you to try new recipes and improve on your cooking skills


Here's how I menu plan:
-Every Thursday my husband and I sit down and think of dishes we would like to eat for the upcoming week. We write down our ideas and include what day of the week we want to eat a specific dish. Of course if you menu plan, you can always switch up what you cook on what day since you already have all the ingredients on hand.
-To make it seem as if our entire evening is not spent menu planning, we do this on commercial breaks in between watching Scandal!
-We get our ideas from cook books, recipes online and bookmarks on my iPad. If I cook something we really like I take a picture of it. That way, when menu planning, I can look back at my phone and pick something to make.
-After we decide what recipes we're going to make, we make a grocery list based on this. I divide my grocery list by fruits and vegetables, meat, diary and packaged items. The categories are completely customized. Do what works for you!
-We go through each recipe and write down the ingredients we need.
-Next, we take a visit to the fridge and pantry and decide what items are expired and need replenishing. We decide on breakfast items, our green juice ingredients and snack items. That's pretty much what our grocery list consist of.
-If I have the opportunity to price match I will take a look at the grocery flyers and see what I can take advantage of. I won't lie in saying that most of the time I skip this step because of time. But I definitely encourage it!
-Another tip: if I run out of a specific item during the week, then I keep a running list on the fridge. That way when I am making my grocery list I can remember what that item is.

That's it! If this has been a really big stress point in your life, I hope these tips can offer a little relief!

Do you have any tips for menu planning?

~RANDOMiss

Monday, 9 February 2015

DIY Lollipop Bouquet

As a follow up to my previous post on the DIY candy bouquet, I thought I would share my DIY lollipop bouquet. Another great idea for a homemade gift on Valentine`s Day! Similar to the candy bouquet, this gift can be used for birthdays, anniversaries, thank you, get well soon, retirement, just thinking of you, bridal/baby shower etc. There is no limit! If the person loves lollipops specifically, this would be a great gift for them!

Materials you will need:
  • Lots of lollipops! It helps to find out what kind of lollipops or brand the person likes. My favourite are Chupa Chups!
  • A mug, vase or container for the bottom. I used a mug as it doubles as vase but the person can also use it as well. Pick something you know the person might like. If they like ice cream, maybe use an ice cream glass. If they like gardening, maybe a watering can?! Think outside the box!
  • Styrofoam
  • Cellophane
  • Ribbon


Steps:
1. Cut your Styrofoam to fit inside your base. I found that using a sphere shaped Styrofoam helped as you want to create a dome shape with the lollipops. If you have another shape of Styrofoam simply shape it to a dome. 


2. Start inserting your lollipops into the Styrofoam along the bottom edges. Go all around until you've created the first layer. Be sure to place your lollipops close enough that the Styrofoam does not show.


3. Next, start placing the lollipops in another layer above the bottom layer you've created. Keep placing lollipops in layers until the Styrofoam is completely covered. If there are any gaps fill those in with any remaining lollipops. Remember, you don't want the Styrofoam to show.


4. Wrap in cellophane and tie with ribbon. You can attach stickers, tags, bows, anything that you like to make it unique!

You're done! It's very simple and easy. You also don't need a whole lot of materials to recreate this DIY.

Try it out and let me know!

~RANDOMiss

Sunday, 8 February 2015

DIY Candy Bouquet

With all things Valentine's, I thought I would share my DIY candy bouquet that can be the perfect gift for that special someone in your life! This is a gift that could not only be used for Valentine's Day, but for many other occasions such as birthdays, anniversaries, congratulations, get well soon, just thinking of you, farewell and retirement to name a few. As long as the person loves candy, you can't go wrong! Plus, it can't hurt to gift something made by you!

The materials you will need:
  • Lots of candy! Get at least four large boxes of candy to make the base. You're not just limited to candy. You could use anything the person likes (chocolate, tea, gummies, gum, etc.). Be creative!
  • Wooden sticks. Try to get the kind that have a pointy side on one end. 
  • Hot glue gun
  • Styrofoam
  • Wrapping/tissue paper
  • Ribbon


Let's get started!

1. Assemble your four largest boxes of candy to form a rectangle. This will be your vase for the candy bouquet. Apply hot glue on the sides of the boxes to stick.


2. Get a smaller pack of candy to glue on the bottom of your vase. This will make sure that whatever you put inside will not fall out. I used a pack of gum and found that this was the perfect size for the bottom.


3. Cut your piece of Styrofoam to fit inside of the vase. I bought a sphere and cut mine into a quarter of the original size. This size fit perfectly inside of the vase. When you're happy with the size push the Styrofoam inside the vase all the way to the bottom.


4. Apply hot glue on the back of your candy and place a wooden stick on each candy with the pointy end of the stick on the bottom. These will form the candy 'flowers' for the bouquet. There is no perfect number on how many you should include. Play around and do as many or as little as you would like. Let the glue completely dry.

5. When the glue has dried completely, insert your wooden sticks with the candy into the Styrofoam. This is where having a pointy end of the stick makes things a whole lot easier! Play around with how you want the bouquet to look like. You can always rearrange if you are not happy with how it looks. It might take a few tries to make it look perfect!


6. Take a piece of wrapping paper or tissue paper and stuff this on top of the Styrofoam in between the sticks. This will hide the Styrofoam as well as keep the sticks secure. Put as much or as little as you would like.

7. You can attach a piece of ribbon or any other decorative piece such as tags, sticks, pictures etc. Make it look unique!

As you can see I also add Fun Dip. Instead of attaching this to a wooden stick I inserted it in between the sticks to hold. It was a little too large to be supported by the sticks. However, the person I made this for loves Fun Dip and I had to include it!

You're done! You can wrap it in clear cellophane if you would like or simply leave it as is! Super fun, super easy and very tasty! You can't go wrong with gifting a candy bouquet! Stay tuned on the blog as I got another exciting DIY candy gift coming up!

Have fun!

~RANDOMiss

Monday, 22 December 2014

How to Prepare for Guests Over the Holidays

Let's face it - we're going to be mingling with a lot of family and friends over the holidays. Whether that means going over for dinner or hosting them yourselves, it's always going to be crazy and fun! Whenever I am hosting (which is very rare since we live in a small town. It's easier for us to go where everyone is), I always assume that everything has to be 'perfect'. Whether it's how the house looks, smells, what you offer to eat, the atmosphere etc...

I hate to give myself that unneeded pressure while hosting and I know that I don't need to feel like that. There are some rituals that I 'stick to' to help ease the pressure. These tips can definitely come in handy around the holidays or really at any other time of the year.

1. Take some time to tidy up the house and clean. - I like to do a deep clean before guests arrive. Doing laundry, cleaning the bathroom, mopping the floors or dusting. Making the house clean makes me feel good and helps me to relax. You also want to ensure that your place looks presentable for guests.

2. Leave an air freshener in the guest bathroom - I don't think I need to say more....you know what I mean! It makes the bathroom smell good as well as helps with other 'situations' as well. I usually get the wall bulbs from Bath and Body Works. Right now I have Mango Dragon Fruit with my Gingerbread man to make
things festive!


3. Have extra toiletries on hand - Whether its extra toilet paper, soap, toothbrush or toothpaste. You never know when someone might have to spend the night or when weather can get bad. Or simply, you might have guests staying overnight or for a period of time and maybe they forgot to pack something. I like to keep extra toothbrushes, toothpaste, floss, soap, shampoo and some other fun stuff. I pick these up and store them away when I get extras from the dentist or from an overnight hotel stay. I also like to keep a separate set of towels and face clothes just for guests.


4. Have some snacks readily available - I don't know about you but it seems to me that my stomach is always growling! I like to eat quite frequently throughout the day by munching on snacks. Be sure to have some healthy options like fruit and yogurt and some other snacks to fulfill that 'other' craving (ie. crackers and cheese, chips, popcorn, chocolate etc..). If you are sleeping in and someone wants to get up and grab something, they know where to help themselves.


5. You can't make everyone happy - If you know that you are inviting that one family member (third cousin twice removed) that always makes a point about something, whether that's cleanliness, your decorations or cooking, try to mentally prepare yourself. You know that this person is going to make a comment. Accept it and just forget about it. At the end of the day, you can never make everyone happy. What counts is that everyone had a good time!

6. The most important tip of all....relax and enjoy yourself! - I can get really caught up in preparing but sometimes I just need to take a step back, relax and enjoy the company. After all, after the holidays everyone will be back to their daily grind. Enjoy the company with family, friends and those that are closest to you.

I hope these tips help to ease the pressure of holidays! How do you prepare for the holidays?

~RANDOMiss

Thursday, 11 December 2014

Gift Wrapping 101

It's that time of year where we all buy gifts and presents for holiday giving. Of course with that comes gift wrapping! I love gift wrapping! I did all of my gift wrapping on the weekend and I try to make an occasion out of it. The hubby and I play Christmas movies (we had Christmas with the Kranks on this weekend!), sip on hot chocolate with the tree all lit up in our PJs. I love it!

I'm not the 'perfect' gift wrapper by all means and I could probably use a tip or two to improve myself. But I thought I would share a few of the tips that I use to make gift wrapping look as neat and tidy as possible.


I always try to buy wrapping paper with grid marks on it. This wrapping paper I bought from Costco and usually all of their wrapping paper has the grid lines (and their paper is also very sturdy and strong!). I find that the grid lines help to measure out how much paper you'll need and to help you cut straight lines as well.


Start by folding in one side of the wrapping paper on your gift. It's okay to use the tape and apply it directly on the gift as you will be covering it up in the following steps.


Then fold the top half of your paper about an inch in and apply rolls of tape on the fold.


Fold it over to completely cover the gift. The fold that you make in the previous step helps to make a perfectly straight line as well as hide the tape. Say yes to no more scissor cut lines!


Fold in the right and left sides so they are tucked in. This will create a triangle at the top and bottom of the gift. Use tape if you need to secure the sides. 


Try to folder the top triangle in. Fold the tip of the bottom triangle in and put a loop of tape on it to secure. 


Fold up and secure with tape. Remember, use the loop tape so that no tape is showing. Again, yes to no scissor cut lines!


Repeat the folding technique on the other side of the gift.


Flip over and you're almost done! To make the gift look extra crisp (like a neatly ironed shirt) take your index finger and thumb and run it along the edges to get that 'crisp' look. 


Add some ribbon and you're done! 

Like I mentioned, I'm not an expert, but these tips help me.

Do you have any gift wrapping tips & tricks? If so, let me know in the comments below!

~RANDOMiss

Sunday, 30 November 2014

Holiday Home Decor

With November gone and December here, Christmas is definitely in the air! I usually get into the Christmas spirit around mid to late November. This year however, we chose to decorate our house on the last weekend of November. I thought it would be neat to show you some pictures of what I've done around the house. I don't have too many things, as we just moved in last year. I'm still working on collecting my Christmas stash!


I bought some special hot chocolate to go along with our holiday decorating! We sipped on hot chocolate, had Christmas music playing and our Mint chocolate Chip candle burning. It was very festive! P.S. The After Eight hot chocolate flavour is really good!


Red and gold decor all the way! Classic, timeless and traditional! The tree skirt is an old table runner that I just wrapped around the base. Honestly, you can be so creative with a tree skirt. Don't bother spending a lot of money at the store when you can get really creative with fabric and other materials that you may have around the house. 


He was from our Holiday celebrations last year! Last year he came with gummies, toffee and popcorn. If you ever get items like these as gifts, save them! They are great for decorating and cost nothing! All we have to do now is name him! If you have any good ideas let me know in the comments below!


My dollar store tree that changes colour. 


This is from my childhood. A snow globe that plays 'We Wish You A Merry Christmas!". 


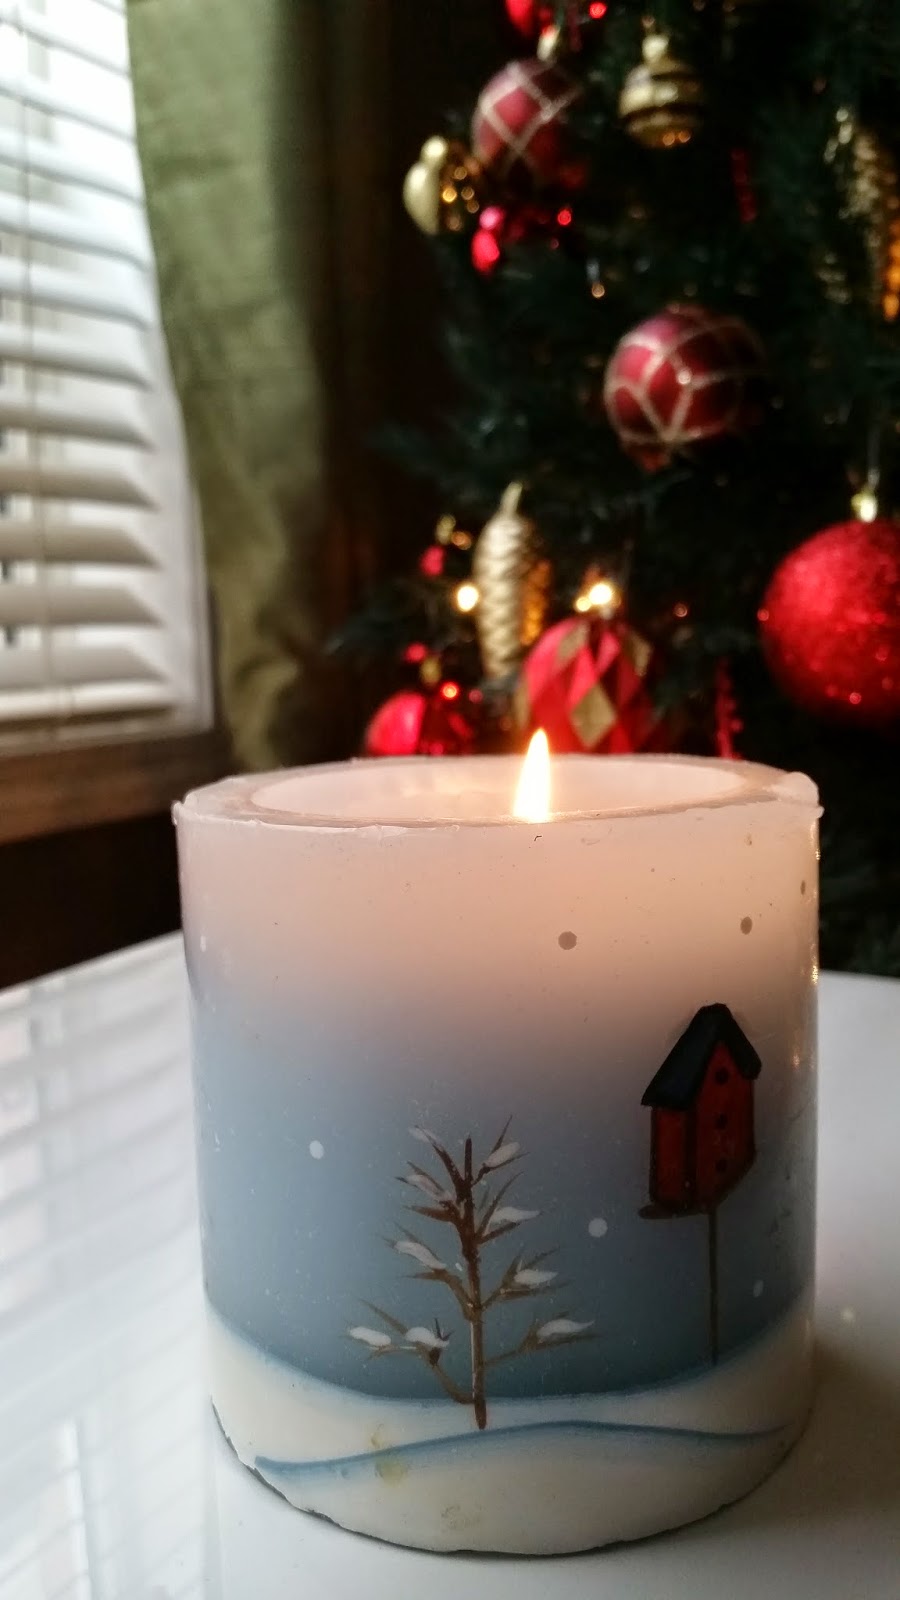
A candle I got back from elementary school from a friend that I still speak to today!


Somewhat of a full view of the living room. 


Purple is mine and red is the husband's! We used command strips to secure them to the railing. 


My kitchen table center piece. I got this as a present last year. It didn't come with the candles so I stuck a pair of Christmas candles I had laying around. It would be nice to add some greenery or holly around the candles to bring the outdoors in. P.S. one of the wicks was not cooperating

And there's my Holiday home decor! I might add things here and there as I see them around stores. There's nothing really major that I absolutely want to add at the moment. For now I like everything the way it is. Simple and festive!

What's your favourite thing to decorate for your home during the holidays?

~RANDOMiss